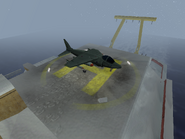
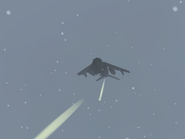
The Harrier is an aerial vehicle that appears only in Counter-Strike: Condition Zero Deleted Scenes.
Overview[]
The Harrier is a fighter jet, equipped with a auto-cannons and missiles. It is unique among other fighter jets due to its ability to do VTOL (Vertical Take-Off and Landing), which means it can land and take off at most surfaces.
The SAS are equipped with this jet, seen in Building Recon. The US Air Force used it as well in Recoil. The Russian Spetsnaz also possessed at least one Harrier as well but it was hijacked by members of the Arctic Avengers faction in Thin Ice and was eventually destroyed.
It takes multiple shots to destroy this with the AWP or the Scout, as seen in Thin Ice.
The in-game model is based on the British Navy variant, the Sea Harrier FA-2, though the Harrier seen in a U.S. Navy SEAL level should be the American variant, the McDonnell Douglas AV-8B Harrier II.
In the future, the role of the Harrier series is expected to be replaced by the Lockheed Martin F-35B, the fifth generation SVTOL fighter/strike jet.
Appearance in Deleted Scenes[]
Building Recon[]
The British SAS briefly used it against an M2-user enemy. Since the player is pinned down, it is unlikely the jet can be seen.
Recoil[]
In Recoil, a few Harriers were deployed a few times. One was conducting air strikes near the crash site, the other was destroying a Scud launcher.
Thin Ice[]
During Thin Ice, the player must defeat a Harrier hijacked by the Arctic Avengers by using an AWP stolen from a dead enemy. A Schmidt Scout, obtainable earlier in the mission, can also damage the Harrier.
Missiles fired from the harrier are predictable. The white dots in the sky indicate where the attack come from, giving the player some time to dodge. Inadequate cover will not offer any protection from missile or cannon fire, thus take the blue crate instead. Also, when it's low on health, it will fire 4 missiles instead of 2, and will sometimes fire a small barrage of missiles at you. These missiles are quite deadly and if you are not paying attention, you might need a few retries to bring it down. The Harrier will also attempt to use its cannon against the player if they gets too close.
As the Harrier is an enemy boss, there are four Wall attached medkits located next to the supply crates with AWP ammo. Some Civilian medkits are also around the crates to help the player.
Players cannot harm the Harrier until it is in air. After the Harrier is downed, the mission is completed.
The best way (or the fastest way) to destroy the Harrier is by quickly switching the AWP and Scout after each shot as opposed to "cook" after each shot.
Gallery[]
Screenshots[]
External links[]
- Harrier Jump Jet at Wikipedia
| |||||||||||


